
How to Set Up a New Bathroom Seat
Replacing a tired, worn-out commode seat is an easy solution that can immediately rejuvenate your bathroom's look. You'll require a few fundamental devices, a little elbow grease, and a desire to get your hands a little filthy. When you've got the old seat eliminated, you might be amazed to discover just just how much of a distinction a sleek, contemporary substitute can make. However before you jump in, there's one considerable action you'll intend to make certain you do not overlook. Overlooking this vital component might lead to all sorts of frustrations down the line.
Key Takeaways
- Gather important devices like a Philips screwdriver, wrench, and tidy dustcloth to get rid of the old commode seat and prepare the surface for the brand-new one.
- Determine the type of bathroom seat and its securing fasteners, then meticulously unscrew or unbolt the old seat to eliminate it.
- Extensively clean the toilet bowl surface area, focusing on the areas where the new seat will certainly place, to eliminate any gunk or residue.
- Select a new commode seat product and design that matches the bathroom aesthetics and make certain a seamless and comfy fit.
- Safely install the new bathroom seat by threading the bolts via the mounting openings and adjusting the rigidity for a secure and comfy fit.

Gather the Required Tools
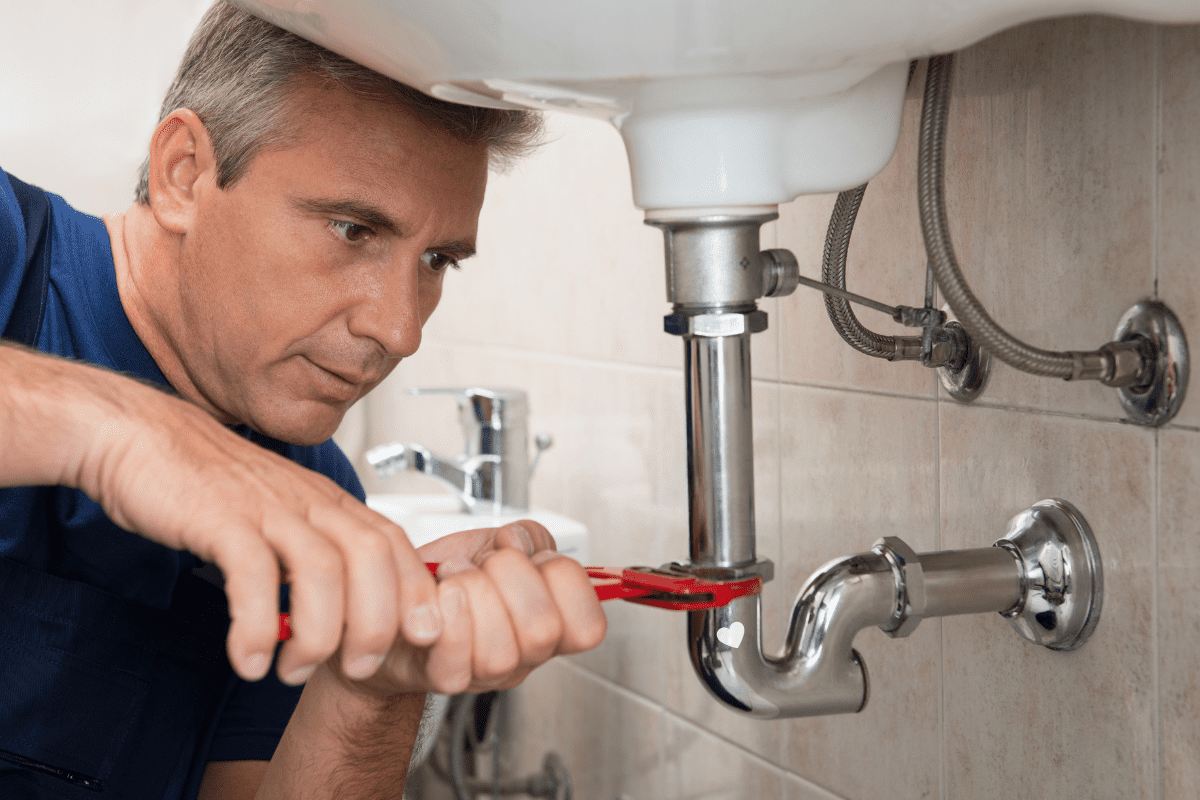
To mount a new commode seat, you'll need a few essential tools: a philips screwdriver, a wrench, and a clean cloth. Depending upon the bathroom seat kinds, the setup procedure might vary a little, yet these basic devices will ensure you can complete the work effectively.
Initially, use the philips screwdriver to eliminate the old toilet seat. Check out the installing hardware and take note of how it's set up - this will certainly help you effectively install the brand-new seat. With the wrench, loosen the nuts that protect the joints to the commode dish. Gently lift off the old seat and established it apart.
Now, provide the commode bowl a fast wipe-down with the clean dustcloth to prepare the surface area for the brand-new seat. Pay very close attention to the setup ideas supplied with your new commode seat, as they'll direct you through the specific steps for your version.
Take your time and double-check your work to ensure a protected, leak-free installation.
Prepare the Commode for Elimination
Initially, you'll require to shut down the water supply to the commode by locating the shutoff valve and turning it clockwise up until it's completely shut.
Next off, drain pipes the commode container by flushing the bathroom.
When the storage tank is empty, eliminate the old bathroom seat by loosening the screws that safeguard it to the bathroom bowl.
Shut Down Water Supply
Turn off the supply of water shutoff behind the toilet before waging the elimination procedure. This is an essential first step in commode maintenance. The water valve is normally situated near the base of the commode, either on the wall or the floor. Just transform the valve clockwise to shut down the water circulation. This will certainly avoid any type of leakages or water spills throughout the commode seat substitute.
Next, flush the toilet to clear the container and dish. This will make the elimination process less complicated and lower the danger of water spills. Make certain to keep a towel convenient in instance of any kind of minor leaks. Once the water system is turned off and the commode is empty, you can begin the process of removing the old commode seat. This will certainly prepare the surface for the installation of the brand-new seat.
Drain Pipes Bathroom Storage Tank
With the water shut off and the bathroom flushed, you can now focus on draining pipes the container.
Get hold of a towel to catch any kind of continuing to be water as you lift the storage tank lid and flush the toilet once again, cleaning out the last of the storage tank water. This will certainly make the removal of the old commode seat a lot more workable.
Next off, examine the commode container for any kind of water drainage problems that might have created water to stay. If you notice any kind of clogs or debris accumulation, make use of a tiny brush or plumbing's snake to clear them out. This will aid assure a smooth and reliable installation of the new commode seat.
As soon as the storage tank is totally drained, you can proceed to the next step: eliminating the old toilet seat.
This action requires some mindful handling, so pay very close attention to any kind of hardware or add-ons that might require to be loosened or detached before the seat can be lifted off.
With the container drained pipes and the old seat eliminated, you're currently all set to set up the brand-new toilet seat.
Eliminate Old Bathroom Seat
Once the toilet tank is fully drained, you can start to remove the old commode seat. Carefully evaluate the attachments and hardware protecting the seat to the bathroom bowl, situating any type of nuts, screws, or clips that need to be loosened up or separated before attempting to raise the seat off.
Remember of the bathroom seat designs and hardware used, as this will certainly notify your selection of the brand-new seat. Some seats might be attached with straightforward plastic clips, while others use steel screws that thread straight right into the toilet bowl. Delicately pry the seat up, being conscious not to crack or damage the porcelain surface area.
With the old seat removed, thoroughly tidy the commode bowl edge to prepare for the brand-new seat. This is a good time to examine the condition of the bowl and take into consideration any required maintenance or repair work.
Complying with the supplier's instructions, set up the brand-new commode seat, making certain a protected and level fit. Remember to test the seat's joints and capability before taking into consideration the job complete.
Detach the Old Bathroom Seat
Disconnecting the old toilet seat normally includes getting rid of the screws or screws safeguarding it to the toilet dish. First, take a look at the type of toilet seat you have, as the process might differ slightly relying on the seat product. For example, wood and plastic seats typically have conveniently removable nuts or wing nuts, while various other seats might call for a screwdriver to loosen the hardware.
Despite the seat product, the standard actions coincide. Begin by finding the bolts beneath the bowl, normally located near the joint points. Using the ideal tool, thoroughly unscrew or unbolt the seat, taking care not to damage the porcelain. As soon as the hardware is eliminated, you can merely lift the old seat off the commode.
With the old seat off the beaten track, you're now prepared to mount the brand-new one. Pay very close attention to the seat material and mounting hardware to ensure an appropriate, protected fit. By following these actions, you'll have the old seat off and be prepared to flawlessly shift to the next phase of your commode seat upgrade.
Clean the Toilet Dish Surface
Before you install the new commode seat, provide the toilet bowl surface a detailed cleansing. This will assure a smooth, seamless shift in between the old and new seats. Make use of a toilet brush and your recommended cleaning service to scrub the bowl, paying attention to the locations where the seat places. Eliminating any type of grime or deposit will certainly assist the new seat fit comfortably and securely.
Maintaining bathroom dish hygiene is vital when replacing the seat. Beginning by splashing the cleaning option around the edge and under the rim where microorganisms and natural resource can gather. Scrub the whole surface, using the bathroom brush to agitate the solution and dislodge any type of build-up. Rinse the bowl extensively to make certain no cleaning chemicals continue to be. Having a clean, fresh surface will give the perfect structure for the brand-new toilet seat installation.
Gather all the necessary cleansing materials ahead of time to make the procedure efficient and problem-free. With a spick-and-span toilet bowl, you're one step better to appreciating your new bathroom seat.
Install the New Bathroom Seat
Now that you have actually cleaned the commode dish, it's time to mount the brand-new seat.
Begin by getting rid of the old seat, after that connect the new one.
Be certain to change the tightness of the seat to assure a safe and secure and comfortable fit.
Eliminate Old Seat
Initially, you'll wish to get rid of the old toilet seat. Find the seat's mounting equipment, commonly screws or nuts, and unscrew or unfasten them to detach the seat from the bathroom dish. Be mindful of the commode seat materials, as some may be a lot more fragile than others. Older wood or plastic seats might be extra susceptible to cracking or breaking during removal, so take additional treatment.
When the old seat is off, check the toilet bowl for any indicators of wear or damages. This is a good time to cleanse the location extensively and deal with any maintenance concerns that might have contributed to the demand for a new seat. Cleaning down the bowl and examining the problem of the mounting hardware can help guarantee a smooth installment of the substitute.
With the old seat eliminated, you're now prepared to wage installing the new toilet seat. Take note of the seat's specifications and verify it's the proper dimension and design for your toilet. Cautious interest to the elimination process will certainly establish you up for an effective brand-new seat installation.
Connect New Seat
The brand-new bathroom seat's installation procedure normally starts by straightening it with the placing openings on the toilet bowl.
Meticulously place the seat, ensuring a correct fit, and after that secure it in position by threading the bolts through the holes and tightening them safely.
As soon as the seat is correctly connected, you'll intend to take into account the products and design of the brand-new seat.
Commode seats come in a variety of materials, such as plastic, timber, and also soft-close variations.
Choose a product that matches your bathroom's aesthetic and fits your individual preferences.
The seat design is additionally an essential variable, with alternatives ranging from extended to round designs.
Validate the new seat aligns with the shape and size of your toilet dish for a smooth and comfortable fit.
Adjust Seat Tightness
Adjusting the rigidity of the freshly set up bathroom seat ensures a protected and comfortable fit. Relying on the seat materials, some modification might be needed to achieve the excellent tension. A lot of toilet seats have actually threaded bolts that allow you to quickly tighten up or loosen up the link to the toilet dish.
Start by gently remaining on the seat to test the first tightness. If it feels too loosened, you'll want to tighten the bolts clockwise until the seat really feels snug however still allows for easy movement. On the other hand, if the seat is also limited, turn the bolts counterclockwise to loosen it.
The objective is to find the perfect equilibrium where the seat stays securely in position yet can still be lifted and gathered very little effort. On a regular basis examine the rigidity and make adjustments as required. This will certainly guarantee the seat remains to supply a safe and secure and comfortable experience every time you make use of the bathroom.
Secure the Toilet Seat Correctly
Secure the bathroom seat by securely tightening the screws that link it to the bathroom dish. This action is essential to assure the seat stays stable and does not wobble. Use the appropriate tools, such as a wrench or pliers, to tighten up the nuts and screws safely. Depending on the seat materials, you may need to readjust the tightness periodically as component of your normal bathroom maintenance.
As soon as the seat is securely in place, examination it out by remaining on it and validating it feels stable and secure. If you see any motion or wobbling, return and tighten the screws better. Remember, the toilet seat ought to be securely secured to the dish to prevent accidents or damage.
Furthermore, keep in mind the upkeep tips for your particular seat products. Some seats may call for periodic lubrication or cleansing to maintain their feature and look.
Finishing Touches
Once you've securely attached the commode seat, include the finishing touches by ensuring a tight, flush fit in between the seat and the bathroom bowl. This won't only enhance the general appearance however additionally help avoid any kind of undesirable spaces or areas.
Beginning by aesthetically evaluating the seat, making sure it's degree and centered on the bathroom. If there are any type of voids, you can make use of a percentage of silicone caulk to load them, creating a seamless connection. This will improve the bathroom seat's aesthetic appeals and make it much easier to maintain.
Next off, wipe down the whole setting up, removing any kind of dust or particles. Think about making use of a bathroom-safe cleaner to maintain the seat looking its finest.
On a regular basis cleansing the toilet seat will not only preserve its appearance but additionally advertise far better hygiene.
Regularly Asked Inquiries
Can I Utilize the Toilet While Installing the New Seat?
Can you utilize the commode while setting up the brand-new seat? It's generally not recommended.
The commode seat installation process entails removing the old seat, which would certainly make the commode unusable throughout that time.
Making use of the commode without any seat in position might be unpleasant and unpleasant.
It's best to prepare ahead, finish the new seat installation, and afterwards return to typical commode use.
Short-term commode remedies may be needed if the installation takes longer than expected.
How Frequently Should I Change the Bathroom Seat?
The commode seat's life expectancy can vary, but a general policy is to change it every 2-3 years.
Indicators that it's time for a replacement consist of cracking, discoloration, or a shaky fit.
Don't wait up until it's totally worn - replace the seat proactively to ensure convenience and sanitation.
When mounting a brand-new one, comply with the supplier's directions meticulously and avoid making use of the bathroom until the procedure is total.
What Sort Of Bathroom Seat Is Ideal for My Restroom?
When selecting a new bathroom seat, think about the products and designs that best fit your washroom.
Plastic, wood, and also lengthened seats are prominent choices. Select a long lasting product like plastic or wood that's simple to tidy.
When it comes to designs, you can locate conventional round seats or lengthened ones to match your toilet's form.
Consider your personal preferences and the overall aesthetic of your restroom to choose the perfect commode seat for your room.
Can I Install a Heated Commode Seat?
Sure, you can absolutely install a warmed toilet seat! The major advantages are raised comfort and warmth, particularly throughout chillier months.
Nevertheless, there are a few installation factors to consider to bear in mind. https://kensalgreenplumber.co.uk Make certain the seat is compatible with your existing toilet which the electrical links are appropriately mounted for safety and security.
With the right prep work, you can delight in the glamorous heat of a warmed seat in your washroom.
Just how Do I Tidy and Preserve the New Toilet Seat?
To cleanse and keep your new toilet seat, beginning by wiping it down with a mild soap and water remedy.
Stay clear of severe chemicals that can damage the materials.
For harder stains, make use of a specialized toilet cleaner and a soft-bristle brush.
Remember to clean up the hinges and under the seat to avoid grime buildup.

Consistently clean the seat completely dry to avoid water places.
With proper treatment, your brand-new commode seat will remain looking its ideal for many years to come.
Verdict
Currently you've mounted the new toilet seat properly.
Check that it's stable and safe, and you're good to go!
Enjoy your freshly updated restroom.